Blog Setup
1. Installing Node, VS Code and downloading the project on your computer.
- You will need node js installed in your computer
You can install node via https://nodejs.org/en/download/ or you can look up any tutorial to install node js on your computer. - Next You will need a code editor like VsCode / Sublime text to write your blog articles.
I will suggest using VS Code. - Download / clone the blog template from our github page to a folder on your computer.https://github.com/webexpe13/blog-template-using-nextjs-typescript-tailwindcss
If you are using Git you can clone the code or click the use template button to generate your own repo.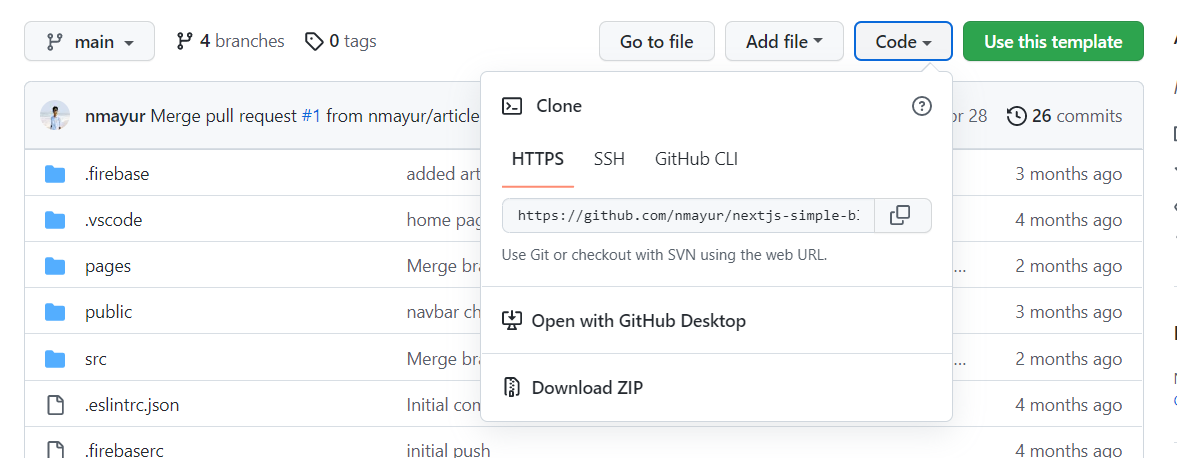
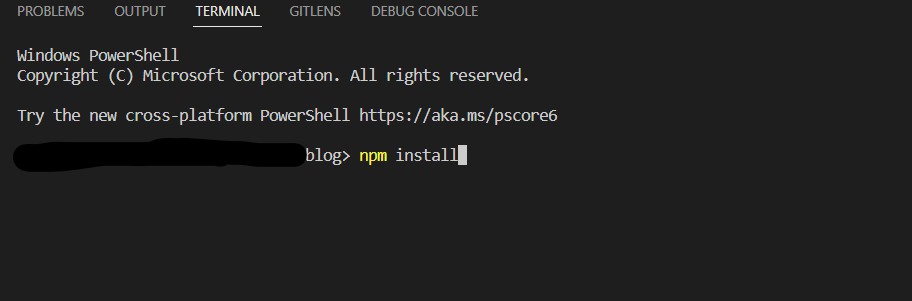
- Open the blog project in VS code.
Open terminal in VS code using ther Terminal button on tool bar of the VS Code window or press ctrl + ~ or cmd + ~. - In Terminal run npm install. This will install all the required packages.After the installation is done run npm start in the terminal, it will start your project on http://localhost:3000/.
If you are facing any difficulty, write a comment on our discussion board LINK
or write to us at webexpe13@gmail.com - If everything goes well you will see a demo blog with few demo articles which will walk you through simple tutorials on how to use layouts and different components to write articles.
2. Setting up authors.
Before we start writing articles we need to setup authors and navbar so that it can be used throughtout the application.
Goto _BLOG_SETUP.tsx in BLOG_CONSTANTS folder. Here you will see some example authors you can refer.
The export const is used to make the item/variable available throughtout the project.
You can add as many authors you want just make sure you keep the format as shown.
// file --> /BLOG_CONSTANTS/_BLOG_SETUP.tsxexport const AUTHOR_NAME: IAuthor = {name: "Full Name",designation: "Work Designation",bio: "Lorem ipsum dolor sit amet, consectetur adipiscing elit, sed do eiusmod tempor incididunt ut labore et dolore magna aliqua.",profilePic: "",social: [{icon: <AiFillGithub />,link: 'https://github.com/'},{icon: <AiFillLinkedin />,link: 'https://www.linkedin.com/'},]}
3. Setting up Main Navbar and Side Nav.
Goto _BLOG_SETUP.tsx file in BLOG_CONSTANTS folder. Here you will see example to setup your navbar.
We have 5 important items to set in navbar setup, type, logo, navLinks, sideNavLinks, socials
// file --> /BLOG_CONSTANTS/_BLOG_SETUP.tsxexport const PRIMARY_NAV = {type: NavbarType.DEFAULT,logo: {},navLinks: [],sideNavLinks: [],socials: [],}
- type
We have two types, NavbarType.DEFAULT | NavbarType.CENTERED// file --> /BLOG_CONSTANTS/_BLOG_SETUP.tsxexport const PRIMARY_NAV = {type: NavbarType.DEFAULT,}// orexport const PRIMARY_NAV = {type: NavbarType.CENTERED,} - logo
You can pass image or text as logo, max logo image height 40px. Save the logo file in public -> images folder and paste the path as shown below
If the logo is text : type: LogoType.Text
If the logo is image : type: LogoType.IMAGEexport const PRIMARY_NAV = {...logo: {type: LogoType.IMAGE,logo: '/images/logo.png',logoLight: '/images/logoLight.png'}...}// orexport const PRIMARY_NAV = {...logo: {type: LogoType.TEXT,logo: 'Next Blog',}...} - navLinks
These are the main nav links. The given code block shows hows to setup primary links for your navbar.export const PRIMARY_NAV = {navLinks: [{label: 'Home',path: '/'},{//IMP: for categories don't add path and add type: dropdownlabel: 'Blog',type: 'dropdown'},{label: 'About Us',path: '/about-us'},{// to open a link in new tab pass newTab: truelabel: 'Support Us',path: 'https://www.buymeacoffee.com/webexpe13z',newTab: true},]} - sideNavLinks
These are the links that will be visible on the side menu. please make sure you are following the example format which is same as the above image.
* note: you can see some extra links like Icons and some Demo Article links these are only visible during development or when you run the project locally on your computer.
These are pages with icons and examples of how to use them.
These pages also include sample blog articles and the smaple components and how to use it. Open the demo article files in your code editor and you can see how many components are used with porper explanations. - socials
These are for your social media links. The given code block shows hows to setup social media links for your navbar.
You can get the icons from Iconsexport const PRIMARY_NAV = {socials: [{link: 'https://www.facebook.com/',icon: <AiFillFacebook />},{link: 'https://www.instagram.com/',icon: <AiFillInstagram />},{link: 'https://twitter.com/',icon: <AiOutlineTwitter />},]}
And thats it, you are ready with the basic setup required to kick start your blog.
For any any queries related to this project / template feel free to connect with us at webexpe13@gmail.com. You can also post any comments on our github discussions.